Installing wrought iron fences takes some work, tools, and knowledge and in this post we will show you how to go about doing it. It may make an excellent weekend DIY project! Read on to learn more!
1. Checking Building Codes
Some neighborhoods will have building codes that regulate the type, placement, and height of fencing. This is especially true if you live in an HOA. This planning may save you many problems further down the line.
2. Measuring And Planning
You must then decide where your new fence will go, how tall it will be, and what style you prefer. This is an ideal time to call to have underground utility lines flagged so you know your post holes will not be in the wrong place.
3. Gathering Materials And Tools
In addition to the wrought iron posts, panels, and gates you will need some supplies to install a wrought iron fence. These materials include: fasteners, post hole diggers, shovels, a level, tape measure, stakes, string, screwdrivers, wheelbarrow, gravel, and fast setting concrete.
4. Setting Outline With Stakes
Set stakes to help ensure you’ve got the right dimensions and angles for your new fence. Drive the stakes at the corners and where it changes direction. At each of these stakes wrap and tightly stretch your string to show where the fence will sit.
5. Digging Post Holes
Dig post holes at corners, on both sides of fence panels, and ending points. Most post holes should be about 2 feet deep and 6 inches in width. Before adding your quick set concrete fill the bottom of your post holes with about 2 inches of gravel. With all of your post holes dug mix your concrete in your wheelbarrow. Don’t make your concrete too wet as it needs to help keep your posts standing straight in the holes.
6. Installing Fence Posts
First put the post in the post hole. Next add the concrete to the hole. Stop pouring your concrete when it’s about 4 inches from the top of the hole. This is done for all of the posts and then a worker uses a level to ensure the posts are straight and set in line with the rest of the fencing. Once the posts are straight and the concrete is holding them up the top 4 inches in the hole is filled loosely with dirt. Wait about a week for the concrete to set before moving on to installing your wrought iron panels.
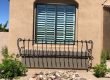
7. Installing Panels
Wrought iron fencing consists of the posts you’ve already installed and panels that fit into them. The panels are attached to the posts using screws or bolts. Line up the panel brackets with the posts and attach the top bracket, then the bottom bracket. Do this for all of the fence panels.
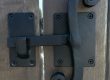
8. Hanging Gates
The last step in installing your wrought iron fence is to hang your wrought iron gate. Most times this will be a gate made for pedestrians to walk through. If it is a driveway gate you’ll likely need to have the help of professional installers to help get it installed correctly. This is especially true if you’re installing an automated gate with a motor.
Phoenix Valley Ornamental Iron
From gates and stair railings to range hoods and entry doors Victory Metal Works will help you design, fabricate, and install the style of wrought iron or other alloy elements for your commercial or residential property. If you’ve got a home or business in the valley that could use new sturdy entry doors that are stylish and secure, we can help! No matter what metal architectural element you need we can help. Give us a call today to discuss your project 480-584-6220.
SCHEDULE A FREE CONSULTATION TODAY!
Victory Metal Works is Arizona’s leading manufacturer of custom wrought iron Entry Doors, Gates, Railings, Fences, Hardware and much more in Scottsdale, Paradise Valley and the Greater Phoenix area. Our experience in the construction industry allows us to make your dreams become a reality. Call us at 480-584-6220 to get your next project started today!